

This is the series of articles about how to setup free own mailserver on OCI.
- Free Mail Server on OCI – Oracle Cloud Account
- Free Mail Server on OCI – Your Domain Name
- Free Mail Server on OCI – IPv4 Address, PTR
- Free Mail Server on OCI – Data Block Volume
- Free Mail Server on OCI – Virtual Cloud Network
- Free Mail Server on OCI – Compute Instance
- Free Mail Server on OCI – Swapfile
- Free Mail Server on OCI – OCFS2
- Free Mail Server on OCI – Docker, Cron, Certbot
- Free Mail Server on OCI – Docker-Mailserver
How to create Oracle Cloud Account and basic setup you can find in this article.
How to link your Domain Name to OCI you can find in this article.
How to reserve public IPv4 address and setup PTR in OCI you can find in this article.
How to create and link Data Block Volume to OCI you can find in this article.
How to create Virtual Cloud Network in OCI you can find in this article.
Compute Instance
At this stage you should have everything to create the OCI VM instance for your Mail Server.
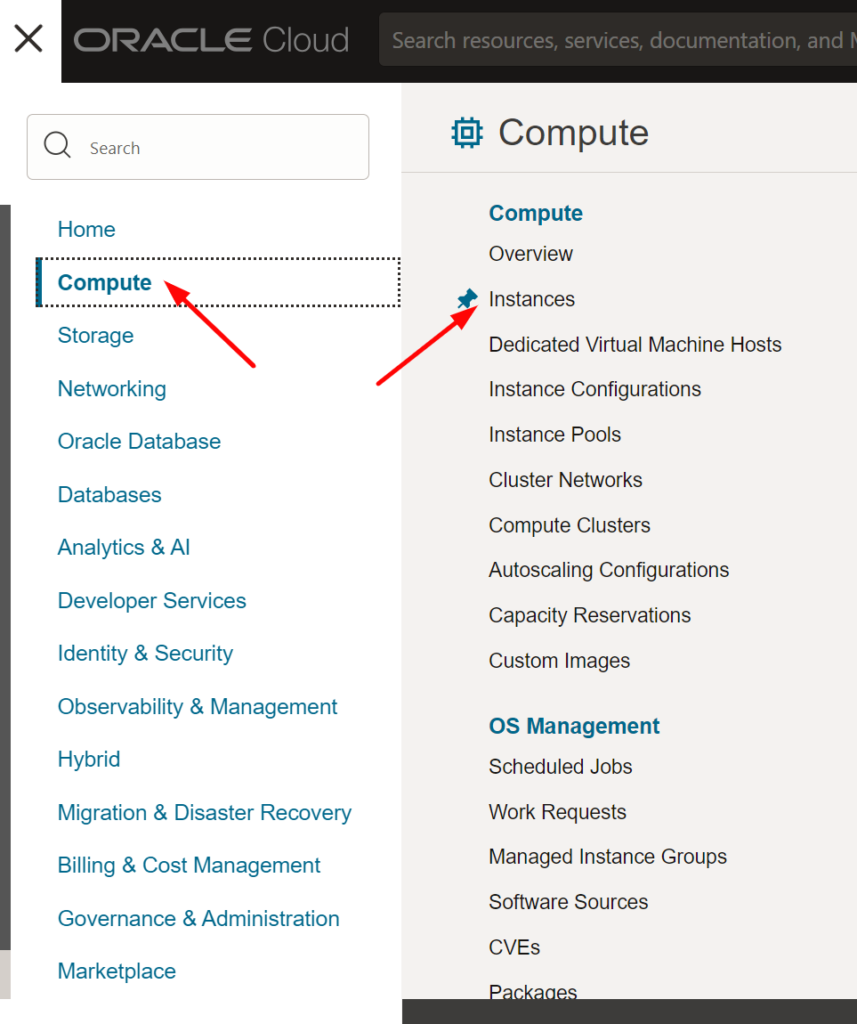
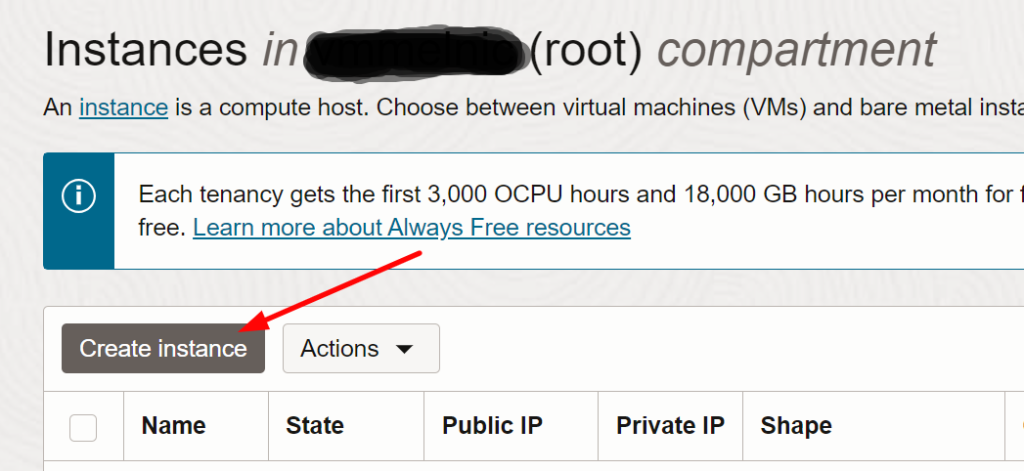
Go to Compute -> Instances and click on Create instance button:
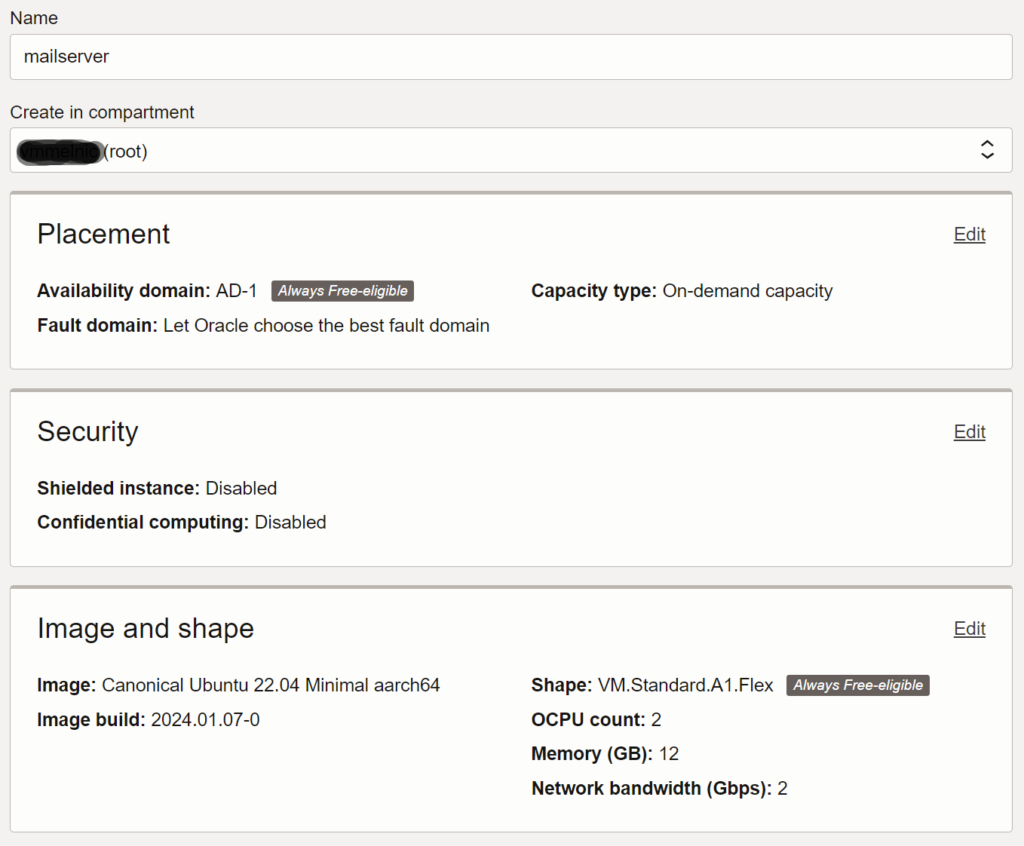
Type the name for your VM instance (mailserver or whatever you like), choose the Compartment, Availability and Fault domains, leave Security as is (or change if you know what you’re doing), choose Image and shape (I’ve selected Canonical Ubuntu 22.04 Minimal aarch64 Image, and VM.Standard.A1.Flex with 2 OCPU and 12 GB of memory):
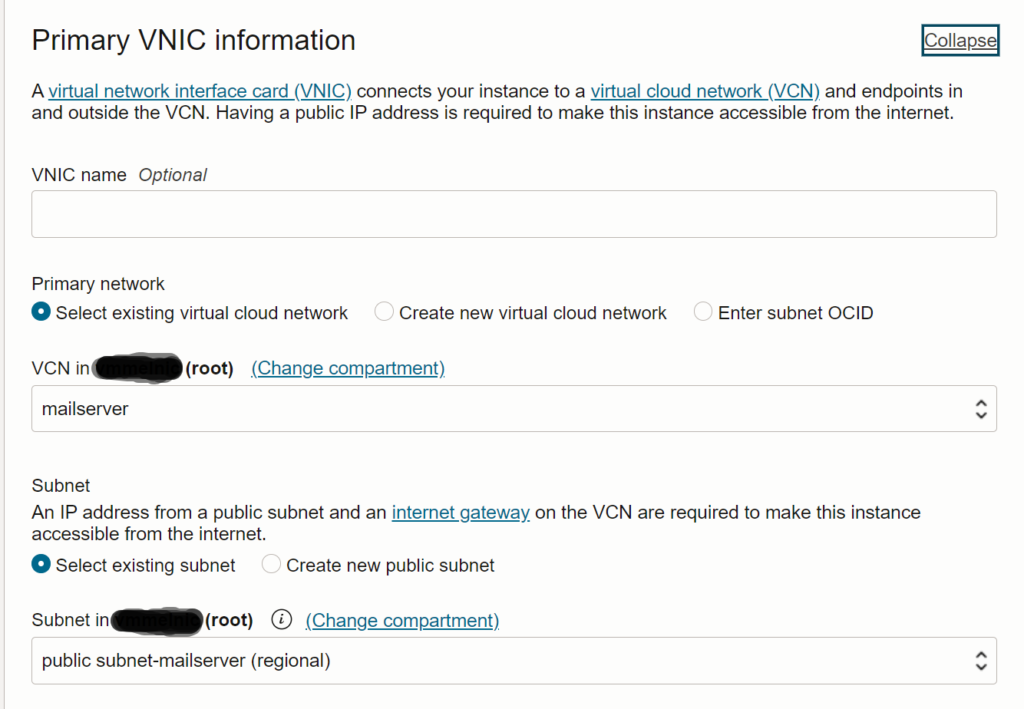
Edit Primary VNIC information, you can leave VNIC name blank, select your VCN (created earlier, subnet will be preselected for you):
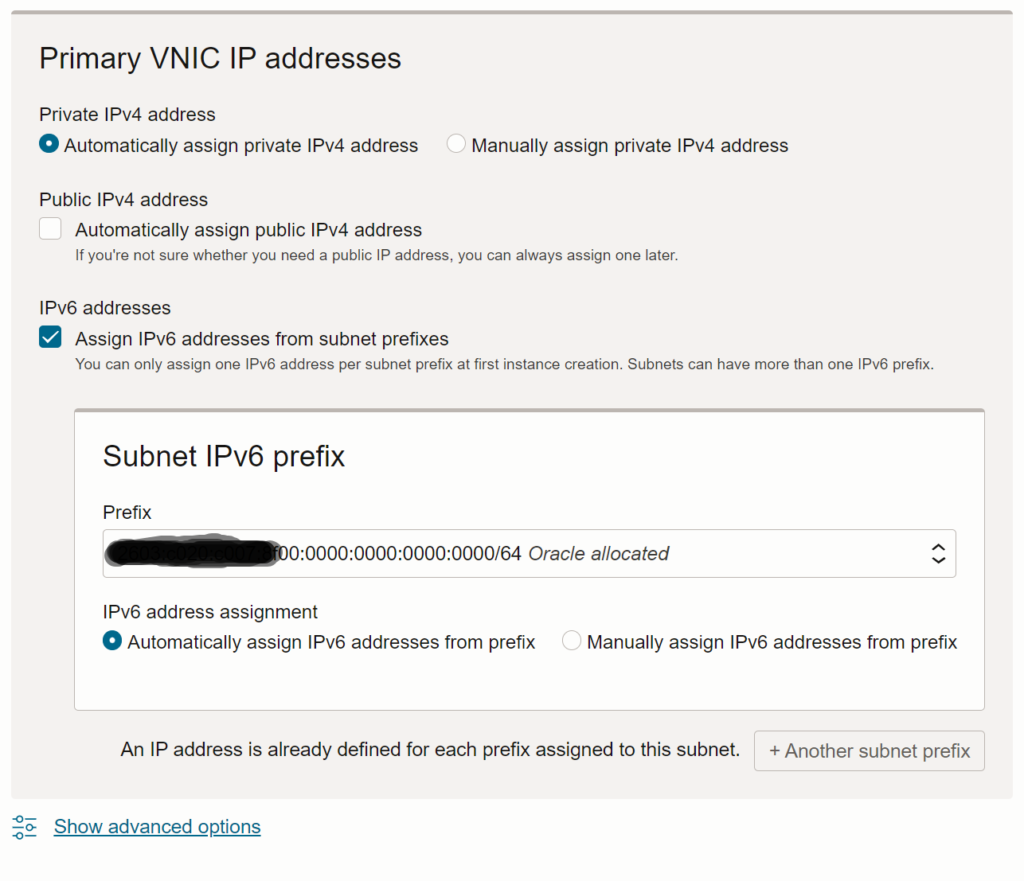
Edit Primary VNIC Ip addresses, tick on Automatically assign private IPv4 address, uncheck Automatically assign public IPv4 address since we will assign reserved IPv4 address, check Assign IPv6 addresses from subnet prefixes and Automatically assign IPv6 addresses from prefix, leave the other settings preselected by default (or change if you know what you are doing):
Download generated SSH keys:
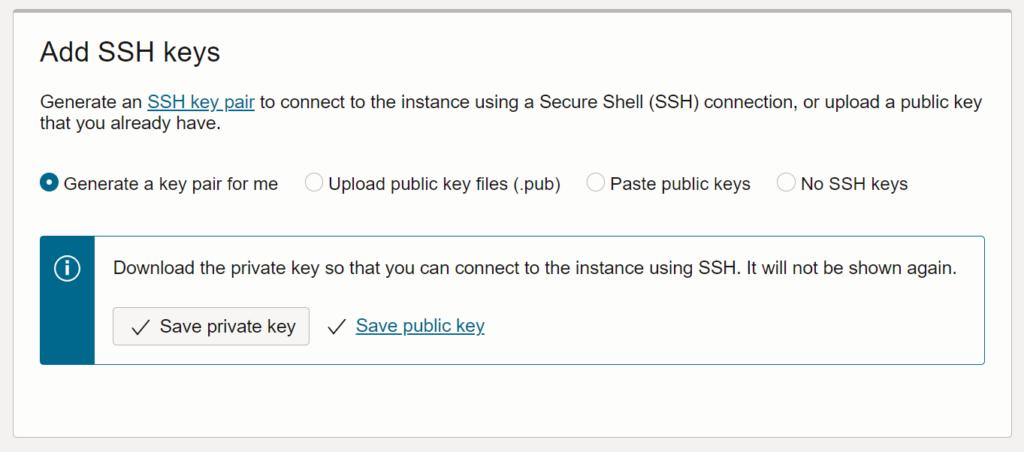
Make sure that the right permissions set to the private key you just downloaded, it should be 0600.
Configure your Boot Volume, 50Gb should be more than enough if you are not planning to store some data on the Boot Volume, slide the VPU to the very right UHP (Ultra High Performance):
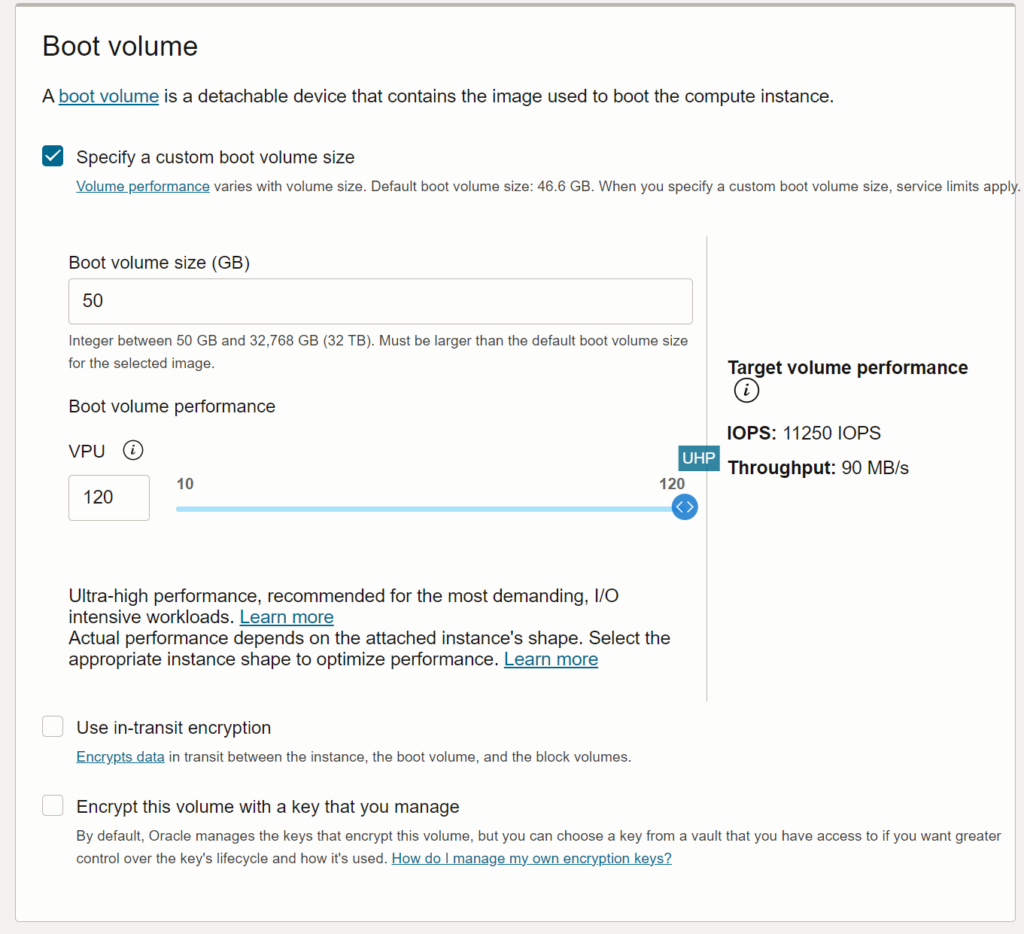
You won’t be able to use/setup Multipath-Enabled Attachments since the number of the OCPU cores for VM.Standard.A1.Flex VM Shape should be minimum 16, in our case it is only 2 (or 4 if you use all of the Always Free), but don’t worry, you still be able to use the VPU of 120 (maximum) for your Boot Volume.
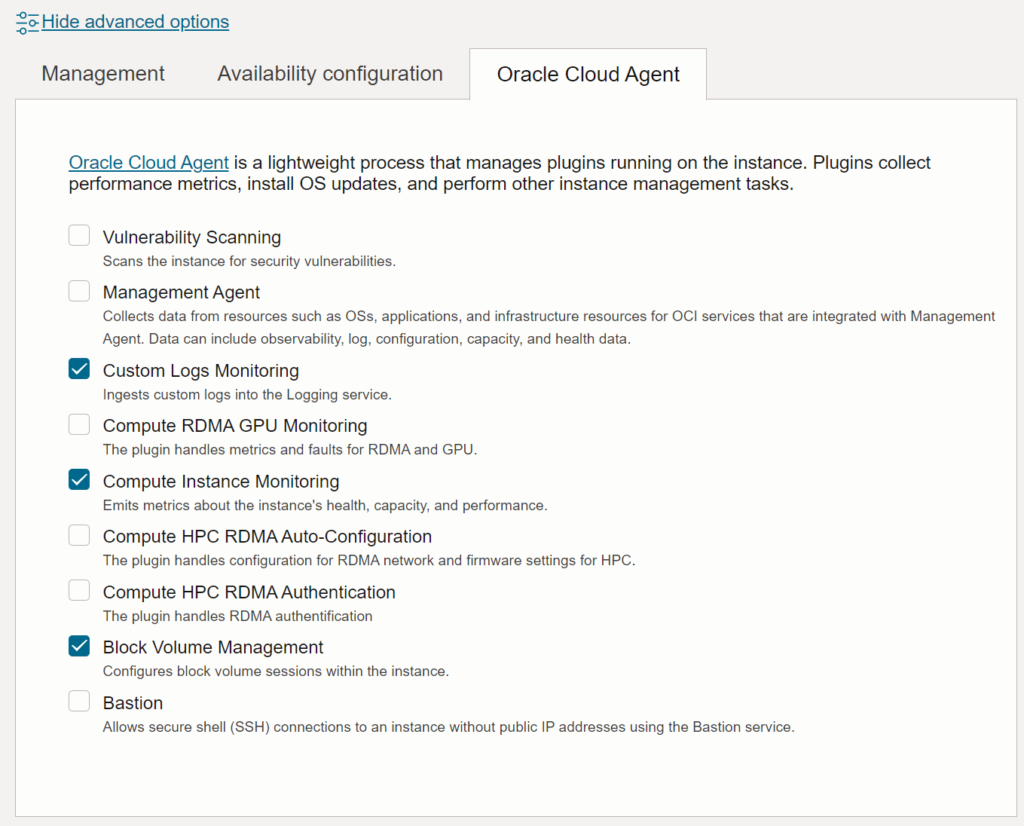
Click on Show Advanced Options link below the Boot Volume, switch to Oracle Cloud Agent and tick the following checkboxes:
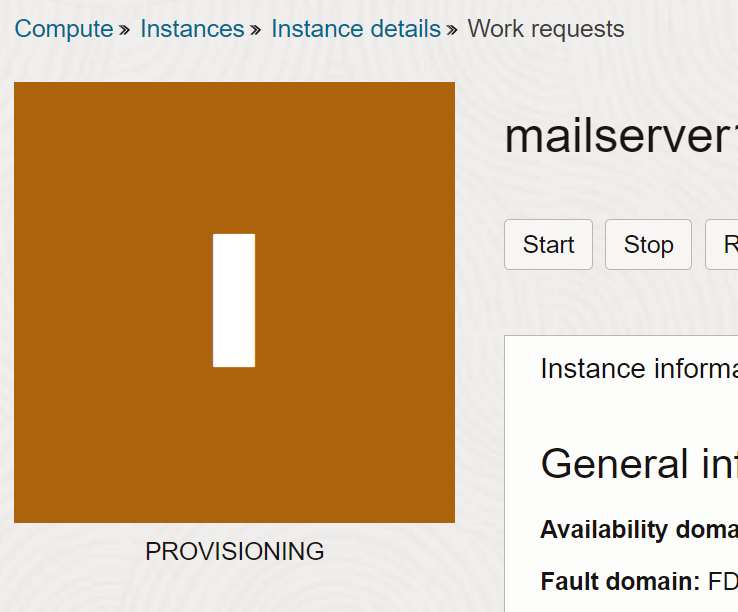
Click on Create button at bottom, the VM instance will be in Provisioning status for a while:
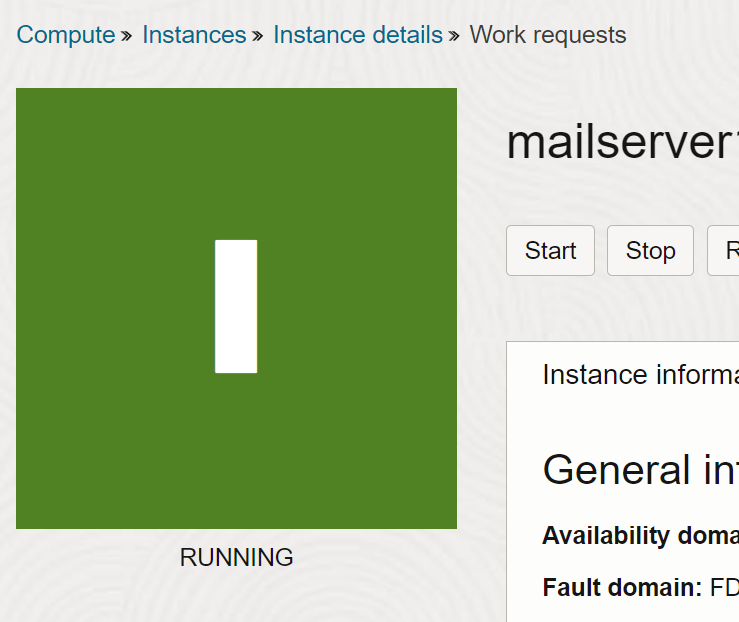
And then (if all good) become Running:
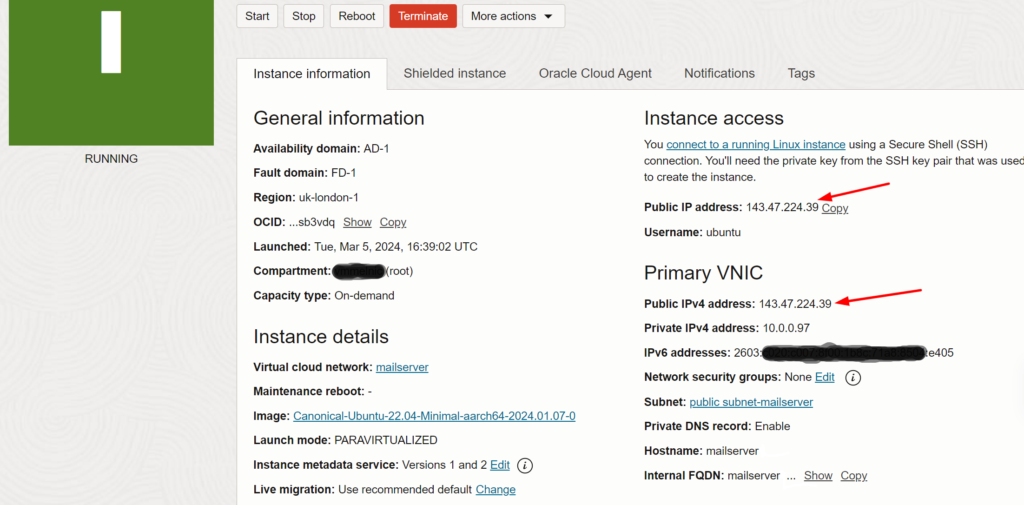
If you go to your VM instance details you will see that there is no Public IPv4 address assigned to the instance, also Boot Volume type is PARAVIRTUALIZED:
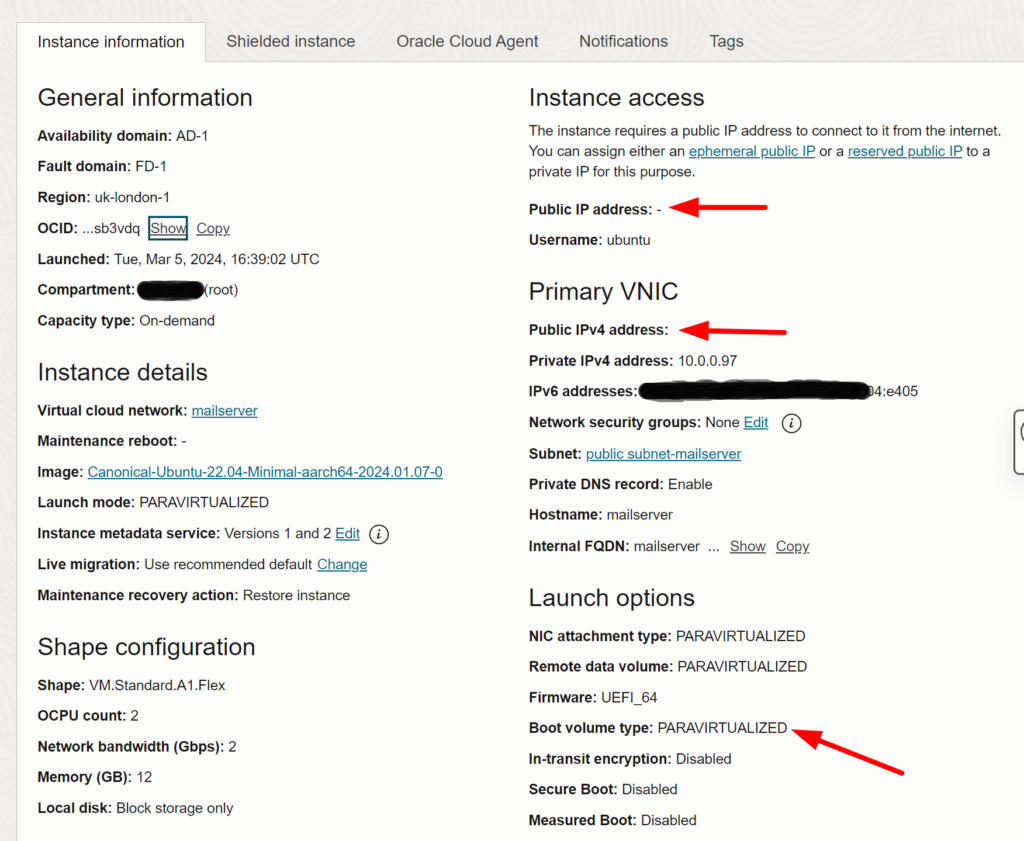
We are going to change it.
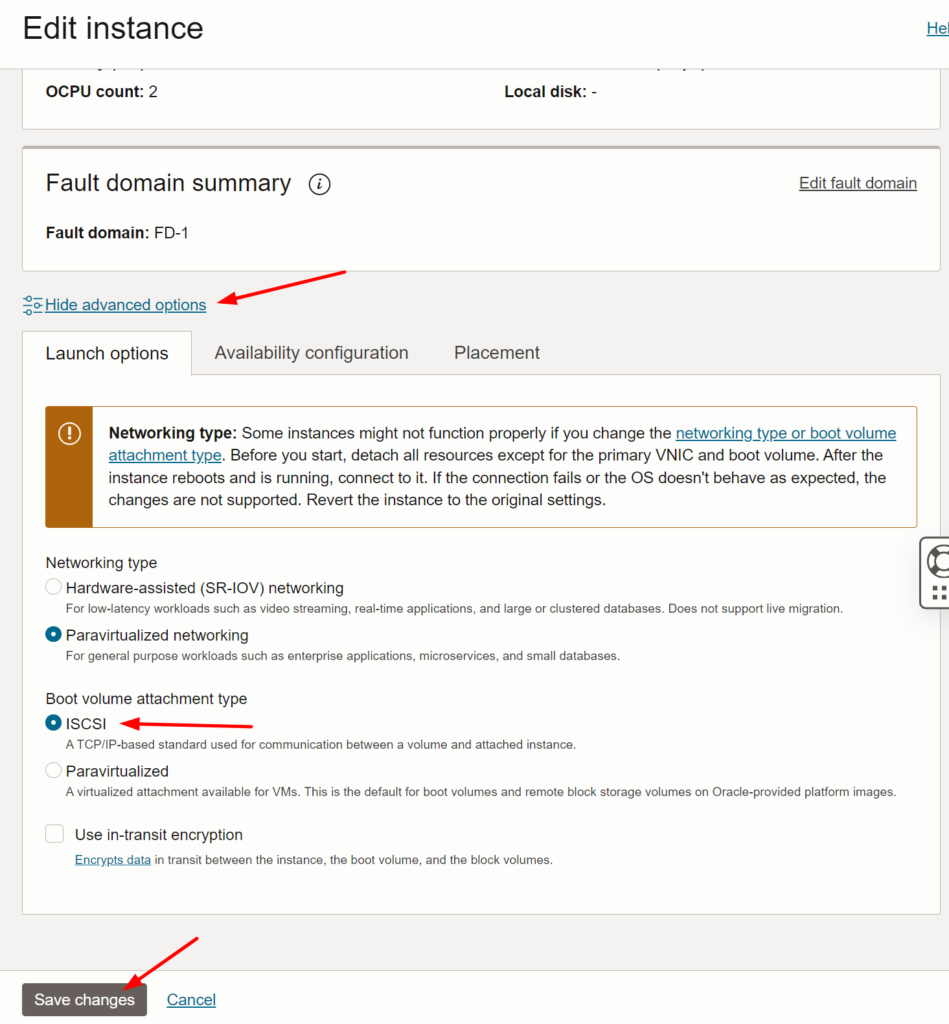
Boot Volume Attachment Type
I will use iSCSI type for Block Volume attachment, it supposed to work faster than paravirtualized type.
Click on Edit button (at top), click on Show advanced options and change the Boot volume attachment type to ISCSI, click on Save changes button:
The pop up will show up:
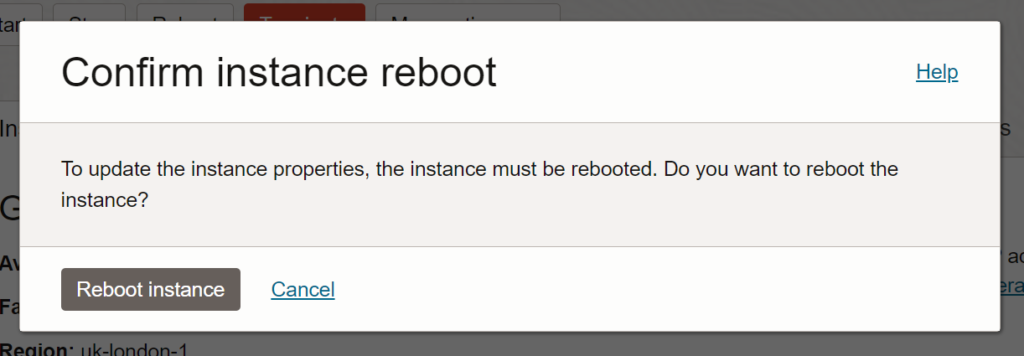
Click on Reboot instance button, the VM instance should restart.
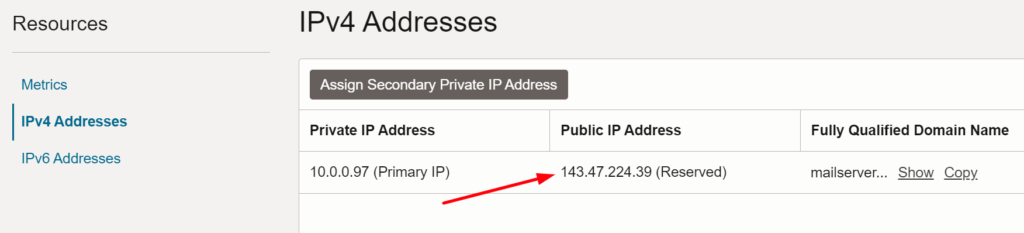
Use your Reserved IPv4 Address
To assign Reserved IPv4 address to VM instance as Public IPv4 address, the IP address needs to be assigned to VM Instance’s VNIC.
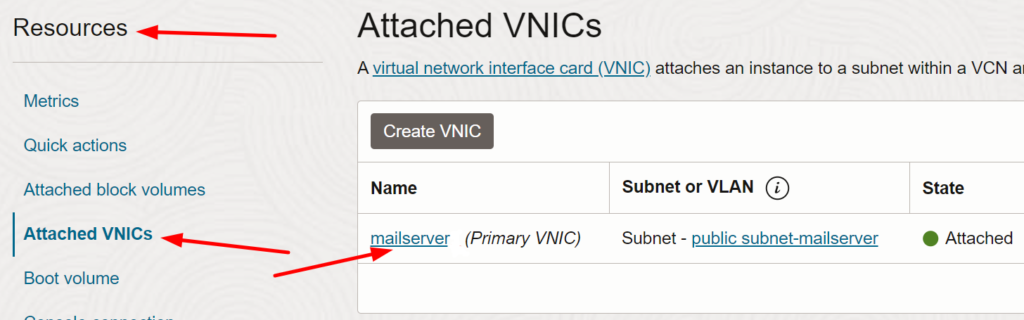
Being on the VM Instance details page, under the Resources (bottom left) click on Attached VNICs and then click on VNIC name (mailserver (Primary NVIC)):
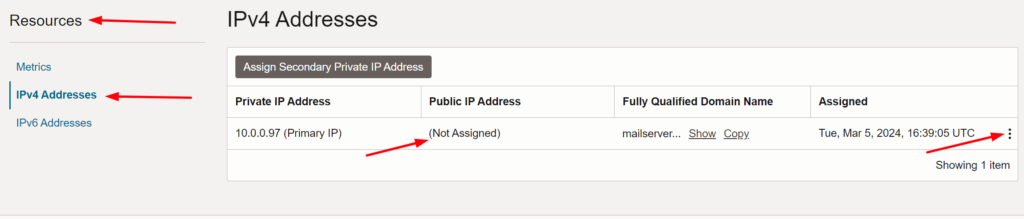
Being on the VNIC’s details page, under the Resources (bottom left) click on IPv4 Addresses and on the three dots (at the right side of the Private IP Address) and Edit button:
On the slide out page change the Public IP Type to Reserved public IP, select your Reserved IP address and click on Update button:
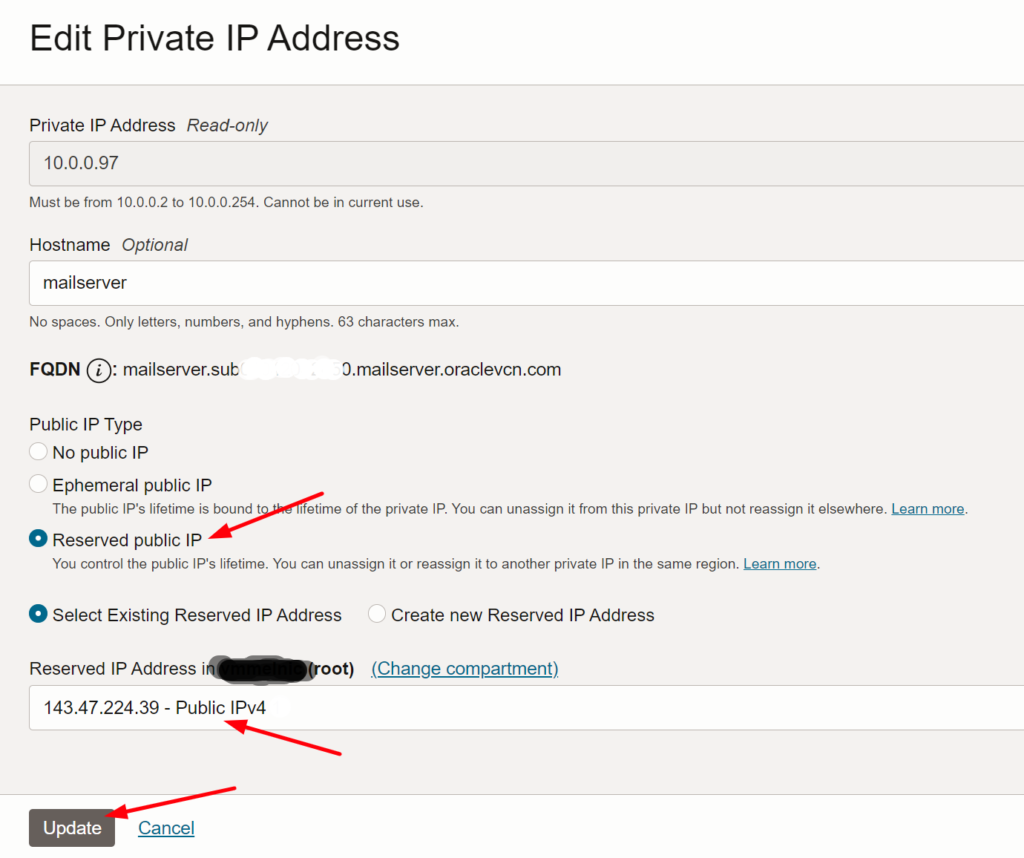
After that you should see your Reserved IP address as a Public IPv4 address assigned to your VNIC as well as to your VM Instance:
Attach Data Block Volume
I will be attaching my data Block Volume as a Shareable Block Volume, because I’m planning to attach this Volume to other VM instances created in the future and use it to store some other data, or read the existing data, so both (or even more) VM instances will be able to read/write to the data Volume simultaneously.
To prevent data corruption from uncontrolled read/write operations we would need to install and configure a cluster aware system or solution such as OCFS2 (Oracle Cluster File System version 2) on top of the shared storage before the volume can be used. The instruction about how to set up OCFS2 you will find below.
Let’s first attach the data Block Volume.
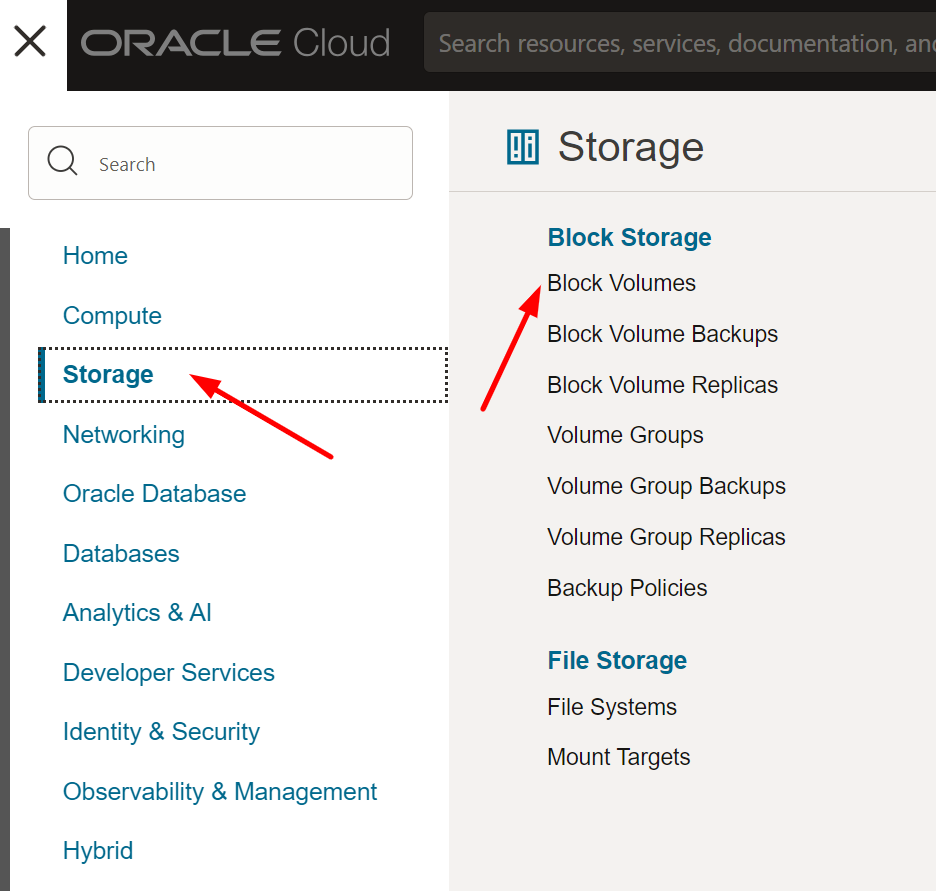
Go to Storage -> Block Volumes:
Click on your data Block Volume, you should see the Block Volume details, under Resources (bottom left) click on Attached Instances link and then click on Attach to Instance button, configure your Block Volume attachment as shown on the screenshot below:
On Instance Details page, under the Resources, click on Attached block volumes and you should see your data Block Volume attached:
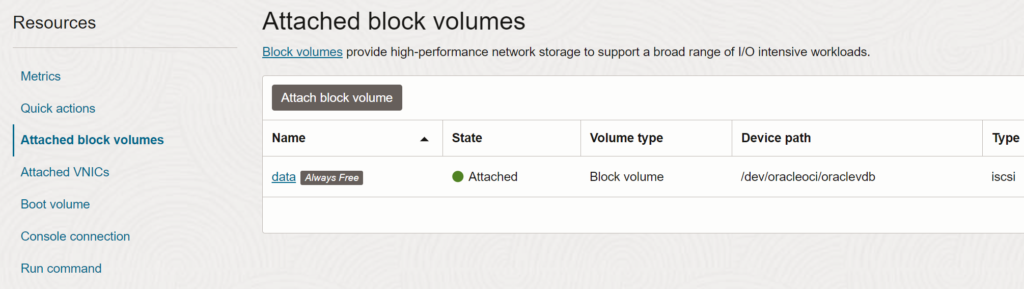
All iSCSI Boot and data Block Volumes attachments to the VM Instance will be handled by Oracle Cloud Agent, so you don’t have to run the iSCSI commands manually (unless you need to mount them in some other way other than default one).
Under Attached VNICs you will find your IPv6 address (if you created one with your VNC), so you can use it later in your AAAA DNS records.
SSH Connection
At this stage you should be able to connect to your OCI VM Instance via SSH.
SSH private and public keys were generated automatically by OCI when you created a VM Instance, hope you downloaded them to your local machine otherwise you won’t be able to connect to your VM Instance.
Connect to you OCI VM Instance by running the following command on your laptop/PC:
ssh -i <path_to_your_private_SSH_key> ubuntu@<IP_address_of_your_VM_instance>If everything is OK you should be connected, so from now on all the following commands, setup and configuration you will be doing on your VM instance via SSH connection.
It’s time to create a Swapfile and enable it on the Virtual Machine, follow this article.
Leave a Reply
You must be logged in to post a comment.