

This is one of the series of the articles about hosting WordPress (any) website on Google Cloud completely (or almost) FREE of charge.
- Overview
- Google Cloud
- Cloud Run. Part 1
- Compute Engine. Part 1
- Cloud Run. Part 2
- Compute Engine. Part 2
At this stage your WordPress application should be running on Cloud Run, the plugins and themes you managing by building your custom container image, the assets you can manage using the WP respective plugins (all of this described in the previous article), the database is managed on Compute Engine, but for some reason it is not enough for you, or it is not something suitable for you, you need full access to your web server. In this case Compute Engine will give you that option.
If you need full access to your web server, ability to monitor any services, check the status, errors, be able to stop/start/restart any services you need, connect to your web server via SSH, SCP or any other protocol, manage any file changes, settings or anything else and keep the changes permanently on persistent disks – you need Compute Engine VM.
Instead of Cloud Run we will move our WordPress container to Compute Engine VM instance, so it will be on the same VM as MariaDB container, within the same local network, no need in custom VCP network, default will work perfectly, and in theory it should even more reduce your costs (to almost 0), since no Cloud Run and no Cloud Storage resources are used, only Compute Engine.
However we would need to make our WordPress accessible from internet, either by opening 80/443 ports, or installing so-called Zero Trust utility, so it will establish the connection to the world from inside of the VM instance and you don’t need to expose any ports for direct connection from internet.
WordPress on Compute Engine
Open the compose.yaml file, add new wordpress service and save it, so the file content will look like:
services:
  # Mariadb service
  mariadb:
    image: mariadb:lts-jammy
    container_name: mariadb
    environment:
      MARIADB_ROOT_PASSWORD: rootpass1234
      MARIADB_DATABASE: wordpress
      MARIADB_USER: wordpress
      MARIADB_PASSWORD: userpass2345
    ports:
      - "3306:3306"
    volumes:
      - /data/mariadb/:/var/lib/mysql/
    restart: always
    healthcheck:
      test: [ "CMD", "healthcheck.sh", "--su-mysql", "--connect" ]
      start_period: 1m
      start_interval: 10s
      interval: 1m
      timeout: 5s
      retries: 3
  # wordpress container
  wordpress:
    image: wordpress:apache
    container_name: wordpress
    environment:
      WORDPRESS_DB_HOST: mariadb
      WORDPRESS_DB_NAME: wordpress
      WORDPRESS_DB_USER: wordpress
      WORDPRESS_DB_PASSWORD: userpass2345
    depends_on:
      mariadb:
        condition: service_healthy
        restart: true
    ports:
      - "80:80"
      - "443:443"
    volumes:
      - /data/wordpress/:/var/www/html/
    restart: always
Upload compose.yaml file to VM instance, run the command:
gcloud compute scp ./docker/compose.yaml ${instance_name}:/data/docker/Connect to your VM instance and run the following command:
sudo docker compose -f /data/docker/compose.yaml up -d wordpressYou should see a “green” confirmation that new Docker compose service wordpress is started, something like:
wordpress-sql:~$ sudo docker compose -f /data/docker/compose.yaml up -d wordpress
[+] Running 22/1
 ✔ wordpress 21 layers [⣿⣿⣿⣿⣿⣿⣿⣿⣿⣿⣿⣿⣿⣿⣿⣿⣿⣿⣿⣿⣿]      0B/0B      Pulled      29.1s
[+] Running 2/2
 ✔ Container mariadb    Healthy                                                  0.0s
 ✔ Container wordpress  Started                                                 10.1s
Docker will automatically create wordpress folder in /data folder of persistent Data Disk.
WordPress should be accessible on port 80 from localhost, let’s check it:
curl localhost -p 80You should see an HTML listing of your WordPress home page, if not – something went wrong, check the logs of wordpress docker container:
sudo docker logs wordpress --tail 50If everything is OK you should see something like:
WordPress not found in /var/www/html - copying now...
Complete! WordPress has been successfully copied to /var/www/html
No 'wp-config.php' found in /var/www/html, but 'WORDPRESS_...' variables supplied; copying 'wp-config-docker.php' (WORDPRESS_DB_HOST WORDPRESS_DB_NAME WORDPRESS_DB_PASSWORD WORDPRESS_DB_USER)
AH00558: apache2: Could not reliably determine the server's fully qualified domain name, using 172.22.0.3. Set the 'ServerName' directive globally to suppress this message
AH00558: apache2: Could not reliably determine the server's fully qualified domain name, using 172.22.0.3. Set the 'ServerName' directive globally to suppress this message
[Fri Feb 23 16:01:01.264114 2024] [mpm_prefork:notice] [pid 1] AH00163: Apache/2.4.57 (Debian) PHP/8.2.16 configured -- resuming normal operations
[Fri Feb 23 16:01:01.264475 2024] [core:notice] [pid 1] AH00094: Command line: 'apache2 -D FOREGROUND'
172.22.0.1 - - [23/Feb/2024:16:06:37 +0000] "GET / HTTP/1.1" 200 85022 "-" "curl/7.88.1"
Open WordPress to Internet
Now we need make sure that the requests from the Internet on ports 80 and 443 will reach the WordPress application.
Run the following command:
gcloud compute firewall-rules create allow-http \
  --network ${network} \
  --allow tcp:80,tcp:443 \
  --priority 65534
Replace ${network} by your network (if it’s custom VCP network, if default – you can remove this parameter).
To check the current firewall rules run the following command (replace ${network} by your network or remove if it’s default):
gcloud compute firewall-rules list --filter="network:${network}"You should see something like:
NAME            NETWORK    DIRECTION  PRIORITY  ALLOW                         DENY  DISABLED
allow-http      wpnetwork  INGRESS    65534     tcp:80,tcp:443                      False
allow-icmp      wpnetwork  INGRESS    65534     icmp                                False
allow-internal  wpnetwork  INGRESS    65534     tcp:0-65535,udp:0-65535,icmp        False
allow-ssh       wpnetwork  INGRESS    65534     tcp:22                              False

To show all fields of the firewall, please show in JSON format: --format=json
To show all fields in table format, please see the examples in --help.
After that you should be able to reach your WordPress from Internet, go to your Google Cloud console > Compute Engine > VM instances, copy external IP and put it in your browser, hit enter, you should be able to see the frontend of your WordPress website.
Yes, you won’t be able to go to your Admin pane, since the previous Cloud Run service URL is written as a hostname of your WordPress website, you can edit it manually in your wordpress database, or you can delete your existing database and restart your MariaDB and wordpress containers, run the following commands (on your VM instance) one by one manually:
sudo docker compose -f /data/docker/compose.yaml down mariadb
sudo docker compose -f /data/docker/compose.yaml down wordpress
sudo rm -fR /data/mariadb
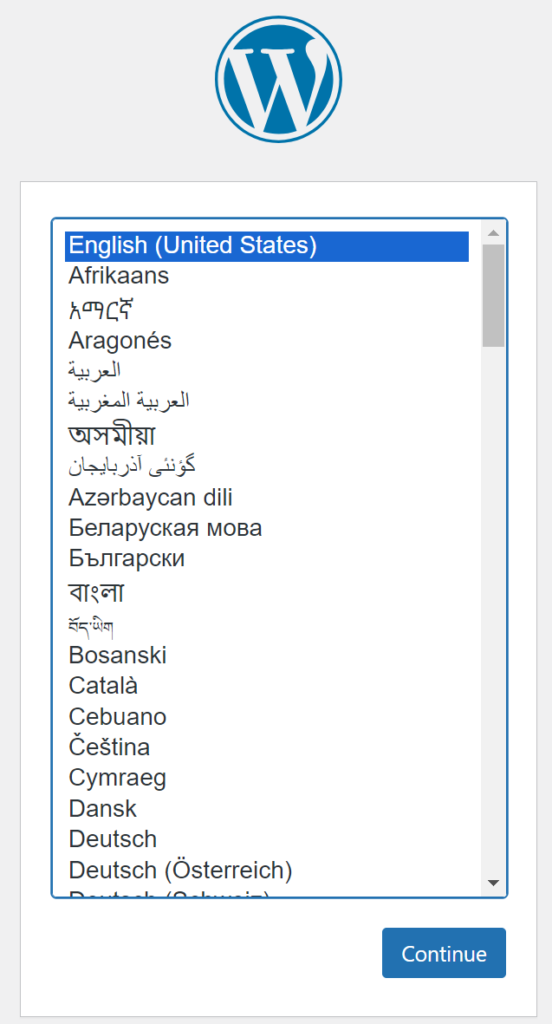
sudo docker compose -f /data/docker/compose.yaml up -d wordpressAfter that, if you enter your VM instance external IP address in your browser you should see WordPress setup page:
Ephemeral External IP Address
Google Cloud Compute Engine won’t charge you for the External IP address assigned to your VM instance, but this IP address will be always different on every VM instance start/restart.
One of the solution to fix this is to update the DNS A record of your domain name which will be used with your WordPress website every time when the VM instance is started/restarted.
I will show you an example based on Cloudflare DNS, you can do/implement anything like that for any other DNS provider, for Google DNS it will be even easier.
Cloudflare DNS
Open your startup.sh script and add the code for updating domain name DNS records, so the file’s content will look like:
#!/bin/bash

################################################################
# Creating Bash variables for further use in the script        #
################################################################
disk_mount_dir=/data
create_file=/var/vm_created

################################################################
# Install all required software and create /var/vm_create file #
################################################################
first_time_run () {
    local disk_uuid=0a09156c-cd23-4176-99fd-855e893fbe9c

    # Mounting SWAP file permanently
    echo "Mounting SWAP file ..."
    dd if=/dev/zero of=/swapfile bs=1M count=1000
    chmod 0600 /swapfile
    mkswap /swapfile
    swapon /swapfile
    echo "/swapfile swap swap defaults 0 0" | tee -a /etc/fstab
    mount -a

    echo "backing up /etc/fstab => /etc/fstab.backup ..."
    cp /etc/fstab /etc/fstab.backup

    # Mounting datadisk permanently
    echo "Mounting datadisk ..."
    mkdir -p ${disk_mount_dir}
    echo "UUID=${disk_uuid} ${disk_mount_dir} ext4 discard,defaults,nofail 0 2" | tee -a /etc/fstab
    mount -a

    # Installing Google Cloud Ops Agent
    echo "Installing Ops Agent ..."
    cd /tmp
    curl -sSO https://dl.google.com/cloudagents/add-google-cloud-ops-agent-repo.sh
    bash add-google-cloud-ops-agent-repo.sh --also-install
    bash add-google-cloud-ops-agent-repo.sh --remove-repo

    # Installing Docker with Docker Compose
    # Source: https://docs.docker.com/engine/install/debian/
    echo "Installing Docker Engine ..."
    # Add Docker's official GPG key:
    apt-get update
    apt-get install --no-install-recommends -yy ca-certificates curl gnupg jq #htop
    install -m 0755 -d /etc/apt/keyrings
    curl -fsSL https://download.docker.com/linux/debian/gpg | gpg --dearmor -o /etc/apt/keyrings/docker.gpg
    chmod a+r /etc/apt/keyrings/docker.gpg

    # Add the repository to Apt sources:
    echo \
        "deb [arch=$(dpkg --print-architecture) signed-by=/etc/apt/keyrings/docker.gpg] https://download.docker.com/linux/debian \
        $(. /etc/os-release && echo "$VERSION_CODENAME") stable" | \
        tee /etc/apt/sources.list.d/docker.list > /dev/null
    apt-get update

    # Install Docker
    apt-get install --no-install-recommends -yy docker-ce docker-ce-cli containerd.io docker-buildx-plugin docker-compose-plugin

    # Cleanup
    apt autoremove -yy

    # craeting CREATED_FILE to avoid running this section next time on restart, only on 1st time create an instance
    touch ${create_file}
}

#####################################################################################
# Updating Ephemeral external IP address to Cloudflare DNS for wp.ivanmelnyk.com    #
#####################################################################################
update_external_ip () {
    local cf_api_token=[your-cloudflare-api-token]
    local metadata_external_ip_url=http://metadata.google.internal/computeMetadata/v1/instance/network-interfaces/0/access-configs/0/external-ip
    local cf_zone=ivanmelnyk.com
    local cf_dns_record=blog.ivanmelnyk.com
    local cf_zone_api_url=https://api.cloudflare.com/client/v4/zones
    # Get the ephemeral external IP address from Metadata
    echo "Updating A DNS RECORD for ${cf_dns_record} on Cloudflare ..."
    local external_ip=$(curl -H "Metadata-Flavor: Google" ${metadata_external_ip_url})
    echo "Current VM instance external ephemeral IP is ${external_ip}"

    if host $cf_dns_record 1.1.1.1 | grep "has address" | grep $external_ip; then
        echo "${cf_dns_record} is currently set to ${external_ip}. No change needed."
    else
        local cf_zone_id=$(curl -s -X GET "${cf_zone_api_url}?name=${cf_zone}&status=active" \
            -H "Authorization: Bearer ${cf_api_token}" \
            -H "Content-Type: application/json" | jq -r '{"result"}[] | .[0] | .id')

        local cf_dns_record_id=$(curl -s -X GET "${cf_zone_api_url}/${cf_zone_id}/dns_records?type=A&name=${cf_dns_record}" \
            -H "Authorization: Bearer ${cf_api_token}" \
            -H "Content-Type: application/json" | jq -r '{"result"}[] | .[0] | .id')

        curl -s -X PUT "${cf_zone_api_url}/${cf_zone_id}/dns_records/${cf_dns_record_id}" \
            -H "Authorization: Bearer ${cf_api_token}" \
            -H "Content-Type: application/json" \
            --data "{\"type\":\"A\",\"name\":\"${cf_dns_record}\",\"content\":\"${external_ip}\",\"ttl\":1,\"proxied\":false}" | jq .

        echo "DNS Record A is updated for ${cf_dns_record}"
    fi
}

if ! [[ -f ${create_file} ]]; then
    first_time_run
fi

update_external_ip
Replace [your-cloudflare-api-token] by your Cloudflare token, ivanmelnyk.com by your apex domain name, blog.ivanmelnyk.com by your subdomain (or WordPress domain).
update_external_ip function will be invoked every time on VM instance start/restart, so the DNS A record of your domain name will be updated every time when the VM instance starts/restarted.
To be able to run this script smoothly we would need to install additional utility – jq, run the following command (on your VM instance):
sudo apt-get update && sudo apt-get install jq -yNow we can update metadata (startup-script) for the VM instance:
gcloud compute instances add-metadata ${instance_name} --metadata-from-file startup-script=startup.shRestart your VM instance, check the External IP address and the DNS A records of your domain name, it should match.
Zero Trust
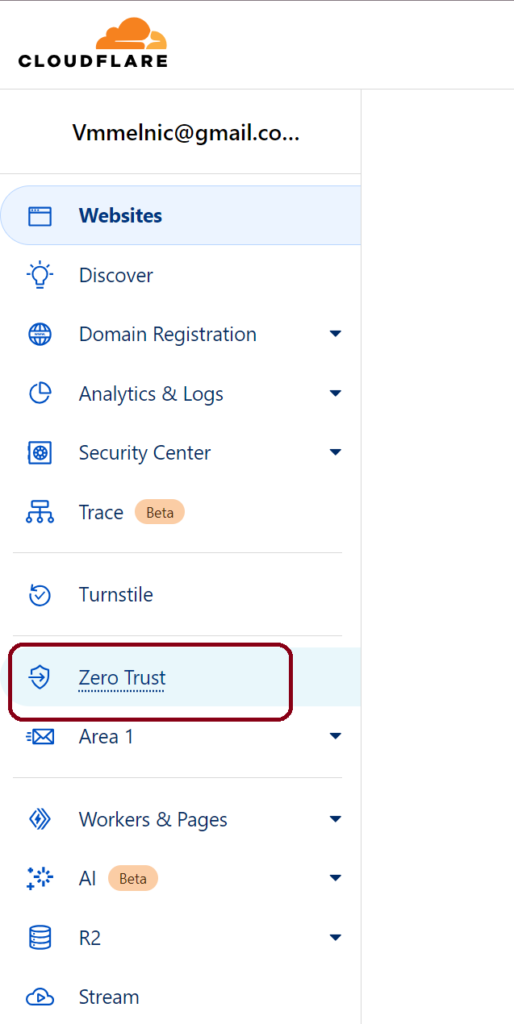
Another solution of how to deal with the dynamic External IP address and do not expose any ports of your VM instance to the Internet is to install Zero Trust client on your VM instance, I will be using Cloudflare (cloudflared) as an example, you should be able to implement any other you like.
Go to Zero Trust on Cloudflare:
Create a new Tunnel in Networks:
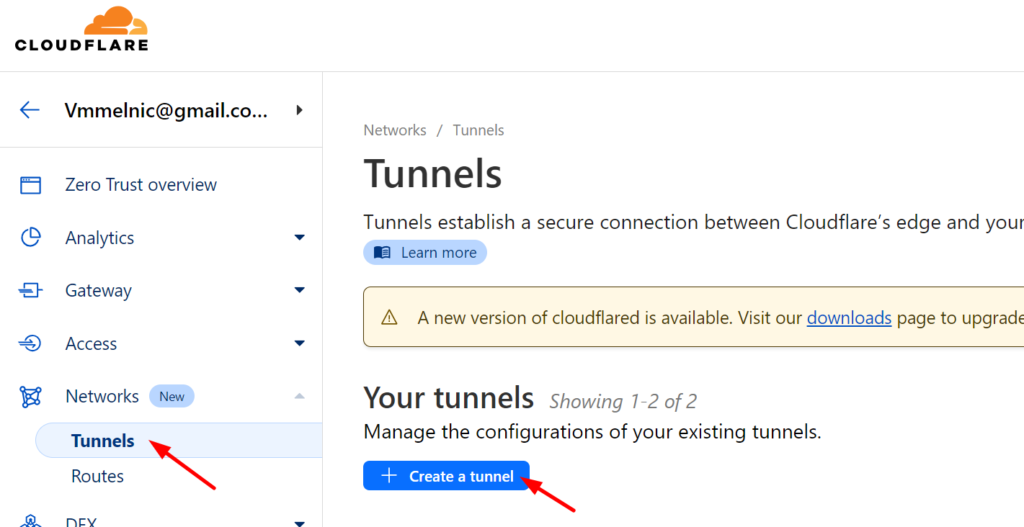
On the Overview tab of just created new Tunnel, you should be able to see the instructions of how to install cloudflared on your machine (depends on the OS, I chose Debian) and how to run the cloudflared service, run the following command in your VM instance:
curl -L --output cloudflared.deb https://github.com/cloudflare/cloudflared/releases/latest/download/cloudflared-linux-amd64.deb &&

sudo dpkg -i cloudflared.deb &&

sudo cloudflared service install [tunnel-token]
Replace [tunnel-token] by your tunnel token. If you want to automate this process you can add these lines to your startup.sh script, so it will look like:
#!/bin/bash

################################################################
# Creating Bash variables for further use in the script        #
################################################################
disk_mount_dir=/data
create_file=/var/vm_created

################################################################
# Install all required software and create /var/vm_create file #
################################################################
first_time_run () {
    local disk_uuid=0a09156c-cd23-4176-99fd-855e893fbe9c
    local cf_tunnel_token=[your-cloudflare-tunnel-token]

    # Mounting SWAP file permanently
    echo "Mounting SWAP file ..."
    dd if=/dev/zero of=/swapfile bs=1M count=1000
    chmod 0600 /swapfile
    mkswap /swapfile
    swapon /swapfile
    echo "/swapfile swap swap defaults 0 0" | tee -a /etc/fstab
    mount -a

    echo "backing up /etc/fstab => /etc/fstab.backup ..."
    cp /etc/fstab /etc/fstab.backup

    # Mounting datadisk permanently
    echo "Mounting datadisk ..."
    mkdir -p ${disk_mount_dir}
    echo "UUID=${disk_uuid} ${disk_mount_dir} ext4 discard,defaults,nofail 0 2" | tee -a /etc/fstab
    mount -a

    # Installing Google Cloud Ops Agent
    echo "Installing Ops Agent ..."
    cd /tmp
    curl -sSO https://dl.google.com/cloudagents/add-google-cloud-ops-agent-repo.sh
    bash add-google-cloud-ops-agent-repo.sh --also-install
    bash add-google-cloud-ops-agent-repo.sh --remove-repo

    # Installing cloudflare zero-trust client
    curl -L --output cloudflared.deb https://github.com/cloudflare/cloudflared/releases/latest/download/cloudflared-linux-amd64.deb
    dpkg -i cloudflared.deb
    cloudflared service install ${cf_tunnel_token}

    # Installing Docker with Docker Compose
    # Source: https://docs.docker.com/engine/install/debian/
    echo "Installing Docker Engine ..."
    # Add Docker's official GPG key:
    apt-get update
    apt-get install --no-install-recommends -yy ca-certificates curl gnupg jq #htop
    install -m 0755 -d /etc/apt/keyrings
    curl -fsSL https://download.docker.com/linux/debian/gpg | gpg --dearmor -o /etc/apt/keyrings/docker.gpg
    chmod a+r /etc/apt/keyrings/docker.gpg

    # Add the repository to Apt sources:
    echo \
        "deb [arch=$(dpkg --print-architecture) signed-by=/etc/apt/keyrings/docker.gpg] https://download.docker.com/linux/debian \
        $(. /etc/os-release && echo "$VERSION_CODENAME") stable" | \
        tee /etc/apt/sources.list.d/docker.list > /dev/null
    apt-get update

    # Install Docker
    apt-get install --no-install-recommends -yy docker-ce docker-ce-cli containerd.io docker-buildx-plugin docker-compose-plugin

    # Cleanup
    apt autoremove -yy

    # craeting CREATED_FILE to avoid running this section next time on restart, only on 1st time create an instance
    touch ${create_file}
}

#####################################################################################
# Updating Ephemeral external IP address to Cloudflare DNS for wp.ivanmelnyk.com    #
#####################################################################################
update_external_ip () {
    local cf_api_token=[your-cloudflare-api-token]
    local metadata_external_ip_url=http://metadata.google.internal/computeMetadata/v1/instance/network-interfaces/0/access-configs/0/external-ip
    local cf_zone=ivanmelnyk.com
    local cf_dns_record=wp.ivanmelnyk.com
    local cf_zone_api_url=https://api.cloudflare.com/client/v4/zones
    # Get the ephemeral external IP address from Metadata
    echo "Updating A DNS RECORD for ${cf_dns_record} on Cloudflare ..."
    local external_ip=$(curl -H "Metadata-Flavor: Google" ${metadata_external_ip_url})
    echo "Current VM instance external ephemeral IP is ${external_ip}"

    if host $cf_dns_record 1.1.1.1 | grep "has address" | grep $external_ip; then
        echo "${cf_dns_record} is currently set to ${external_ip}. No change needed."
    else
        local cf_zone_id=$(curl -s -X GET "${cf_zone_api_url}?name=${cf_zone}&status=active" \
            -H "Authorization: Bearer ${cf_api_token}" \
            -H "Content-Type: application/json" | jq -r '{"result"}[] | .[0] | .id')

        local cf_dns_record_id=$(curl -s -X GET "${cf_zone_api_url}/${cf_zone_id}/dns_records?type=A&name=${cf_dns_record}" \
            -H "Authorization: Bearer ${cf_api_token}" \
            -H "Content-Type: application/json" | jq -r '{"result"}[] | .[0] | .id')

        curl -s -X PUT "${cf_zone_api_url}/${cf_zone_id}/dns_records/${cf_dns_record_id}" \
            -H "Authorization: Bearer ${cf_api_token}" \
            -H "Content-Type: application/json" \
            --data "{\"type\":\"A\",\"name\":\"${cf_dns_record}\",\"content\":\"${external_ip}\",\"ttl\":1,\"proxied\":false}" | jq .

        echo "DNS Record A is updated for ${cf_dns_record}"
    fi
}

if ! [[ -f ${create_file} ]]; then
    first_time_run
fi

update_external_ip
After that you can delete DNS A record of your domain name, link your domain name to the tunnel you created on cloudflare and delete Compute Engine firewall rules for ports 80 and 443, since it will be managed by Cloudflare now.
Conclusion
This is it, you have WordPress hosted on Google Cloud completely FREE of costs.
You are using wordpress:apache Docker image with mariadb:lts-jammy, however you should be able to use any other Docker image combination for your WordPress application, for example mariadb:lts-jammy + nginx:alpine + wordpress:6.4-php8.3-fpm-alpine.
Please also consider to move your passwords and tokens to the Google Secrets, Google gives you 6 secret versions for free (within Free Tier limits).
Leave a Reply
You must be logged in to post a comment.